Showing posts with label food. Show all posts

Wednesday, April 4, 2012

Getting Into Shape


Since it has been over 6 weeks since I had Lucy, I got the go-ahead from my doctor to pretty much do anything (yay!). So, with that in mind, I'm going to try my darned hardest to get into shape. I'm not going to say "get back into shape" 'cause, well, honestly, I haven't been in shape since I was a kid. Unless you count round. Round is a shape, right?

Moving on from horrible jokes....

I would love to lose 60 pounds. I understand that is going to take a long time. For me, it's not a matter of looking pretty or being able to fit in certain clothes. Those are nice, but I have to do this for my health. I am at severely high risk for diabetes and heart disease (both run in my family. Yay...?) Technically, I'm obese. I know I don't look it. I hide my fat well. But it's true.

So, the time has come for me to shed all this excess baggage and start down a healthier road. It's going to be hard as Dylan and I have such different needs regarding food. He needs a high-calorie, high-protein diet because of his manual labor job. I, on the other hand, do not need all those calories.

This is going to be difficult. Dylan and I love pizza. We have it at least once a week in some form or fashion. But I must resist (Dyl actually made a frozen pizza last night and I'm sure there are leftovers....) I must be strong. I must stand my ground, and fight against the calories which come my way.

I threw myself under the food bus by making brownies last night. Baaaaad move....

An online tool which I'm hoping will help me is called the Super Tracker. It's actually put out by the United States Department of Agriculture (USDA). Not only does it show you how many portions a day, but I can track my food intake and my physical activities. It also gives me a personalized plan showing me how many calories a day I'm suppose to eat, taking into account me trying to lose weight as well as the fact that I'm breastfeeding. It's really nice, and I'm hoping that by having to track everything, it'll keep me accountable.

Yesterday was my first day of tracking everything. It was a so-so day. I learned that I eat a ton of empty calories and I barely eat any dairy. I also went over my limit of sodium as well. Not good. Today I'm hoping to get a bit better.

Sidenote: Soda is definitely out. Drank a can of root beer yesterday. Had 152 calories in the whole thing. Empty calories? 150. Eww.....

So, in addition to the recipes and random stuff about babies I put up from time to time, I also am going to share my weight loss journey with you. If you, too, are wanting to lose weight, I invite you to join me in this life-changing experience. I'm not planning to go on a "diet". Rather, I'm wanting to have a life change; change the way I view food.

So let's share our ups and downs. Share tips and ways you've found to combat the evil fat monster. As Red once said, "Remember, I'm pulling for you. We're all in this together."

Monday, April 2, 2012

Root Beer BBQ Pulled Pork

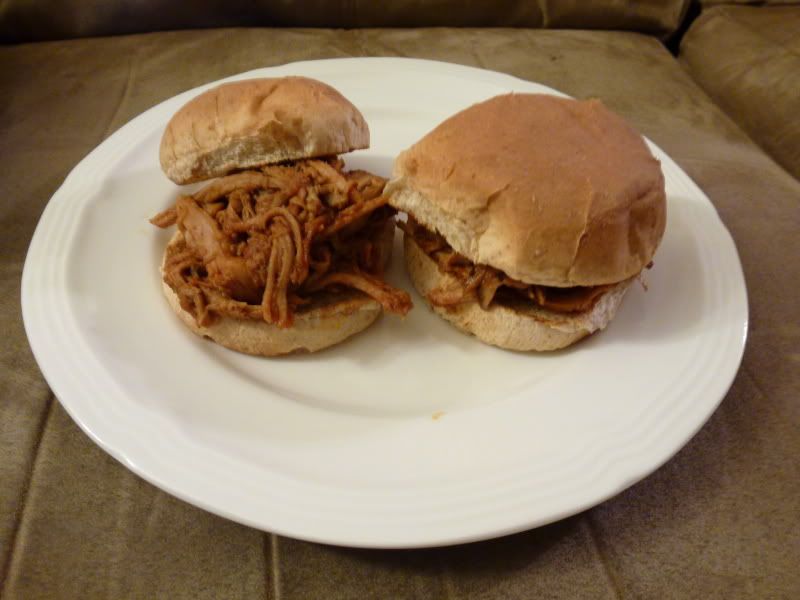
So there's this popular idea of making BBQ Pulled Pork with root beer that's been floating around the Internet recently. I loved pulled pork and I love root beer and I could see how the combo could work, so I decided that this was something I would have to try. Dylan also loves pulled pork, so I wanted to see if I could make one of his favorite BBQ recipes at home. It turned out great! But, lemme give you the recipe and then I can rave about how good it was.

Ingredients
  • 1 (2 pound) pork tenderloin
  • 1 (12 fluid ounce) can or bottle root beer
  • 1 (18 ounce) bottle your favorite barbecue sauce
  • 8 hamburger buns, split and lightly toasted
Directions
Place the pork tenderloin in a slow cooker; pour the root beer over the meat. Cover and cook on low until well cooked and the pork shreds easily, 6 to 7 hours. Note: the actual length of time may vary according to individual slow cooker. Drain well. Stir in barbecue sauce. Serve over hamburger buns.


My Take

The smell of it while it was cooking was a bit....weird, so at first I was really worried if it was going to turn out right. I've never made pulled pork before, so this was all new to me. But it turned out fabulous! I did change the recipe a little bit.


First, before I put the tenderloin in the slow cooker, I rubbed it with a little bit of salt, pepper, and garlic salt, just to add a bit of flavor to it. Then, I poked a few holes in it with a fork, just to make sure the juices could get in there and do their magic.

Then I cooked it for 5 hours, took it out and drained the root beer. I proceeded to shred the pork, mix it in with some BBQ sauce (didn't use a whole bottle, just did it by sight) and then cooked it for another hour, to get the sauce nice and absorbed into the meat.

Now, if I had to do it over again, I think I might use a different cut of meat, like a shoulder cut, as it would give me more meat for cheaper. Also, I used Famous Dave's BBQ sauce, but I think next time, since I cooked it with root beer, I might have to try it with the A&W BBQ sauce, just to keep the root beer flavor more intact.

This was totally a winner in my house, and it was very easy to make, so I'm totally going to have to make this again.

Lemme know if you try it and how it turned out for you! I love to hear from you, my loyal readers. Also, let me know if there's something you've heard me talk about that you would want the recipe for. I tend to do my posts around food that I've cooked in the past week or so.

Anywho, that's all I have for now. Dunno what'll be up next. We'll just have to see. :)

Monday, March 26, 2012

Cabin Fever

Time goes by so fast. Lucy-Lu is already over a month old, and I still feel like I'm learning something new about her every day! But, things are getting easier....somewhat.....

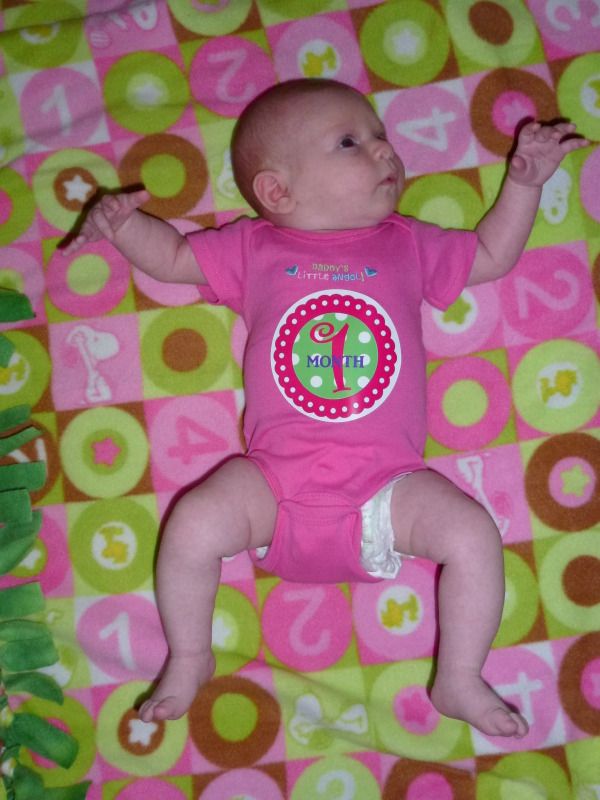
Isn't she just the cutest thing?

The other day, I just broke down. I just started feeling like I never left the apartment any more except to go to church or to a parent's house. I was getting depressed 'cause I felt like I didn't have anyone to hang out with (which I know is partically my fault as I don't reach out, but who said depression had to make sense?). I was also starting to get stressed from taking care of Lucy. We're having a somewhat hard time right now as we're trying to get her on a "stay awake during the day, sleep at night" schedule, and that's hard to do with a month old. So, I think Thursday/Friday I stayed up for 23 hour straight, which as soon as Dylan came home from work, I passed the baby off to him and went straight to bed.

The next day wasn't much better. I started the day by snapping at Dylan, which made him get upset, but I tried to explain why I was so short. I think I must have somehow communicated my frustration with him, 'cause he took Lucy over to his mom's house for the day. I sat at home and moped around, and took a 4 hour nap. Dyl came back home at 11 and Lu was sleeping, but I was still grumpy. So, at 2 am, I went down to the grocery store and bought some Chinese.

Unless you're a stay-at-home mom or feeling the effects of cabin fever, you have no idea how just going to the grocery store can feel. (To help alleviate the depression, I bought myself an Oreo cookie cake....)

Honestly, that actually made me feel tons better.

Now, why do I make a post complaining about this? Is it to gain sympathy from you, my loyal readers? No, it's not. I'm not grasping for attention or crying for help or anything like that. I'm simply sharing my experience with you. This blog is about me adjusting to being a stay-at-home mom and a housewife, so I thought I should share the bad along with the good. My life isn't perfect (far from it!) so if you ever feel stressed or just want to get away, trust me, I know how you feel.

That's pretty much all I have to say in this here post. There's a new recipe that I'm probably going to try this week or weekend (Crockpot BBQ Pulled Pork made with Root Beer) so I may have a post up about that.

Oh, completely off topic, I did make a Beef and Irish Stout Stew, but it turned out horribly. I burned it not once, but twice (I blame having to take care of Lucy and not watching it closely enough) so that might have been part of it. I don't think I'm going to write a full blog about it since I don't really have any positive things to say about it at all. Here's a link to the recipe if you would like to try it yourself (only thing I added was some red potatoes).

Wednesday, March 14, 2012

Baked Buffalo Wings

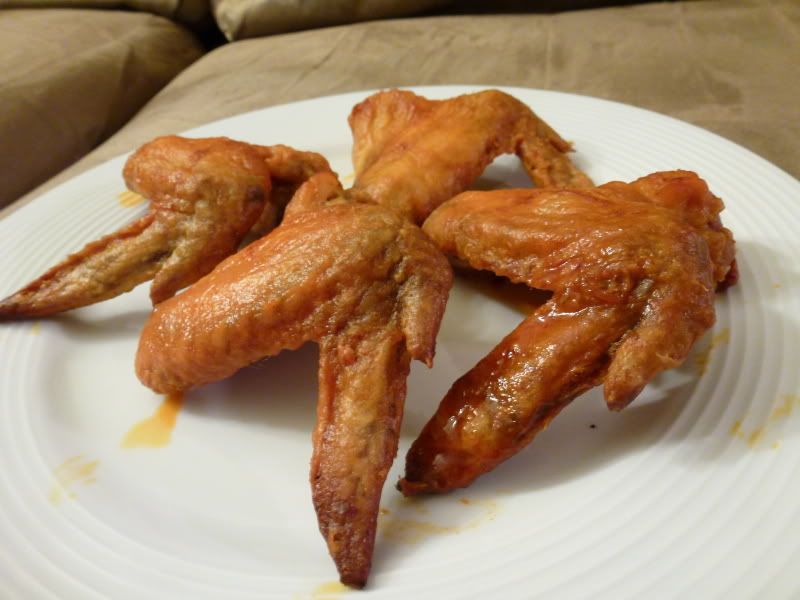
I personally do not like buffalo wings. I think it's because of the hot sauce used in them, but whatever the reason, I've never been a big fan. Dylan, however, is. So when I came across this recipe for baking buffalo wings as opposed to frying them, I was intrigued. This was something I could make at home and it would be healthier than the fried version (not that Dylan cares. :p) The recipe that I'm going to give is the original recipe for 20 wings. I adjusted it for 8 wings (as that's all I had, since just one person was going to be eating them). Also, I did a few things that aren't in the original recipe, so after I do the recipe and "My Take", I'm going to post an adjusted recipe with all my changes (except for the serving size change). So, here we go!

Ingredients
  • 3/4 cup all-purpose flour
  • 1/2 teaspoon cayenne pepper
  • 1/2 teaspoon garlic powder
  • 1/2 teaspoon salt
  • 20 chicken wings
  • 1/2 cup melted butter
  • 1/2 cup hot pepper sauce (such as Frank's RedHot®)
Directions
  • Line a baking sheet with aluminum foil, and lightly grease with cooking spray. Place the flour, cayenne pepper, garlic powder, and salt into a resealable plastic bag, and shake to mix. Add the chicken wings, seal, and toss until well coated with the flour mixture. Place the wings onto the prepared baking sheet, and place into the refrigerator. Refrigerate at least 1 hour.
  • Preheat oven to 400 degrees F (200 degrees C)
  • Whisk together the melted butter and hot sauce in a small bowl. Dip the wings into the butter mixture, and place back on the baking sheet. Bake in the preheated oven until the chicken is no longer pink in the center, and crispy on the outside, about 45 minutes. Turn the wings over halfway during cooking so they cook evenly.


My Take


As stated above, I don't like buffalo wings, so I didn't even try these. Just the smell of the sauce was just icky to me. But, I feed them to Dylan (my taste-tester) and he loved them. I was worried about them being soggy, but he said that the texture was perfect. I was also worried about them drying out, but he said they were fine.


So here's what I changed in the recipe to make them all good:
  • I made sure that the wings were nice and dry by squeezing them with a paper towel before I dredged them in the flour mixture.
  • Instead of cooking them on a baking sheet, I baked them on a cooling rack over a baking sheet to keep them out of the juices to keep them from getting soggy.
  • Instead of immediatly putting the sauce on them, I first baked one side for 25 minutes, flipped them and cooked them an additional 25 minutes. Then I put the sauce on them and baked them for 5 additional minutes. 
I didn't change any of the ingredients, so I'll just list the "new" directions.

Revised Directions
  • Squeeze and pat the chicken wings dry with a paper towel, making sure all excess moisture is gone.
  • Mix the flour, cayenne pepper, garlic powder, and salt into a resealable plastic bag and shake to mix. Add the chicken wings, seal, and toss until well coated with the flour mixture. Place the wings onto a baking sheet and place in the refrigerator. Refrigerate at least 1 hour.
  • Preheat oven to 400 degrees F (200 degrees C)
  • Spray a cooling rack with cooking spray and place over a cooking sheet. Place the wings on the cooling rack and place in the oven. Cook on one side for 25 minutes. Flip and cook for another 25 minutes.
  • Whisk together the melted butter and hot sauce in a small bowl. Dip the wings into the butter mixture and place back on the cooling rack. Bake for an additional 5 minutes. If desired, drizzle or coat the wings with remaining sauce.
As always, lemme know if you try out this recipe. Comments are always appreciated! :)

Thursday, September 22, 2011

Southwest Chicken Wrap and Baby Update

Okay, so this "recipe" is really quick and easy to make. Sorry that I don't have exact measurements for some of the ingredients, but they are really up to taste. (You'll see what I mean when I get there) So first, the recipe, then, the gabbing. :)

Ingredients
  • 1 can of canned chicken breast
  • 1 can of corn
  • 1 can of black beans, no sodium added
  • Taco seasoning
  • Fresh cilantro, finally chopped
Directions
Put everything in a bowl and mix together, adding taco seasoning and cilantro to taste.

My Take
Well, that was easy, wasn't it? And it's pretty healthy as well. If you're worried about adding too much taco seasoning, just start with a little bit at a time, mixing well and then doing a taste test. I personally like quite a bit of the flavor, so I add a good bit. As for the cilantro, I would err on the side of too little rather than too much. Cilantro, in my opinion, has a very strong taste, so you probably don't want to add too much, unless you really love the flavor it brings.

The best way to eat this, again, in my opinion, is to heat up the mixture and then serve it in a flour tortilla with sour cream on top. My mom, on the other hand, eats it cold. Either way works since the canned chicken is already cooked. You can probably come up with other toppings that would be delicious with it. Tell me about them!


Baby Lucy!
Today marks my halfway point in my pregnancy. It's crazy thinking that I'm already this far along. At this point, I'm getting really anxious about becoming a mother. I know that before I found out I was pregnant I was really wanting a child, but now I'm terrified that I don't have what it takes. Probably most first time mothers go through this stage of anxiety, but I dunno....sometimes you feel like you're the only one going through something. Selfishness, I guess.

She's been moving around a lot recently, more so tonight. Guess that's another thing I have to get use to. It's only going to get worse as she grows. lol

But, with all this anxiety, there also comes a sense of happiness and joy. Yes, it's coming from the fact that in about 20 weeks I'm going to have a baby girl, but it's also coming from the fact that I'm hoping to be a (mostly) stay-at-home mom. Because of finances and the like, I'll have to work some, but I'm hoping it'll only be 15 hours a week (3 hours a day, Mon-Fri). That's what my job is technically suppose to be, but I get more hours since I work out on the sales floor as well. This has me really excited 'cause my whole career aspiration right now is to be like Mrs. Beaver from Leave it to Beaver. I dunno, I've just always had this fantasy with me staying at home and raising the kids and cooking things from scratch. *sighs* How great would that be. What would make it even more amazing is if the house would just clean itself. lol.

Well, I'm going to call it a night, on the blogging front anyways. I think my next post is going to be showing my geekiness and be about video games. Let's see how many people I can scare away from my blog, shall we? lol.

Saturday, September 17, 2011

Beef Enchiladas

I love this recipe. If I could eat these every night, I would. Of course, I probably say that about a lot of things, but trust me, these are delicious. I think the thing I love most about these is that you make the enchilada sauce. It's not something you just get out of a can and pour over the top of the enchiladas. Not saying anything is wrong with that, but I like being able to control the flavoring. Must be a control issue......Anywho, onto the recipe!

Ingredients
  • 1 lb lean (at least 80%) ground beef
  • 1 medium onion, chopped (1/2 cup)
  • 1/2 cup sour cream
  • 1 cup shredded Cheddar cheese (4 oz)
  • 2 tablespoons chopped fresh parsley
  • 1/4 teaspoon pepper
  • 1/3 cup chopped green bell pepper
  • 2/3 cup water
  • 2 tablespoon chili powder
  • 1 1/2 teaspoons chopped fresh or 1/2 teaspoon dried oregano leaves
  • 1/4 teaspoon ground cumin
  • 1 can (4.5 oz) chopped green chiles, drained
  • 1 clove garlic, finely chopped
  • 1 can (15 oz) tomato sauce
  • 8 corn tortillas (5 or 6 inches)
  • Shredded cheese, sour cream, and chopped onions, if desired (for topping)
Directions
  • Heat oven to 350°F 
  • In 10-inch skillet, cook beef over medium heat 8-10 minutes, stirring occasionally, until brown; drain. Stir in onion, sour cream, 1 cup cheese, the parsley and pepper. Cover and remove from heat.
  • In 2-quart saucepan, heat bell pepper, water, chili powder, oregano, cumin, chiles, garlic and tomato sauce to boiling, stirring occasionally; reduce heat. Simmer uncovered 5 minutes. Pour into ungreased 9-inch pie plate.
  • Dip each tortilla into sauce in pie plate to coat both sides. Spoon about 1/4 cup beef mixture onto each tortilla; roll tortilla around filling. Place seam side down in ungreased 11x7-inch glass baking dish. Pour remaining suace over enchiladas.
  • Bake uncovered about 20 minutes or until bubbly. Garnish with shredded cheese, sour cream, and chopped onion.
My Take

Okay, so if you read my Cafe Strawn blog, then you'll know Dylan and I are extremely picky eaters. So, how do I even stand to look at this recipe with all the onions and peppers and chiles? Simple, I don't use them! And honestly, it turns out perfectly for us. I'm sure that if you liked those kinds of things then it would still work great for you, but honestly, we wouldn't eat it, so no point in making something we wouldn't eat!

I've made these things about 3 times and this last time I doubled the sauce part, as when I got to the part where you pour the remaining sauce over the enchiladas, I barely had anything left and they turned out a bit too dry for my tastes. But now this time, it seemed I had too much sauce, as the enchiladas didn't crisp up as much as I would have liked them to. I think I'll have to tinker with it a bit more to find the balance that I like texture-wise.

One final thing that I tweaked about this recipe was that I put cheese on top of the enchiladas about 5 minutes before they were done cooking. Gotta have my cheese!

So there ya have it, a beef enchilada recipe where you get to make your own enchilada sauce. If you find yourself making this in the future, comment and lemme know how it turned out. Let me know of any changes that you made and what worked and what didn't work.

Happy Cooking! :)

Thursday, September 15, 2011

Starting Over

Yes, I'm starting another blog, but this one will be easier to upkeep, I think, because I'm rolling all my blogs into one. That's right; I'm combining Cafe Strawn and Shiloh's Stitches into one blog that will also contain little snippets of my life in general. Sound exciting? I'm sure it does. But don't worry! I'm going to keep the other blogs online so you can go back and look at the recipes/older posts. I thought about putting them all here, but that was too much work, so eh. They'll just be on a separate website is all. :)

This first post is more of an intro post and just kinda catching everyone up on stuffs. First of all, if you haven't heard the news (There's people that still don't know?! *gasp*) Dylan and I are expecting our first child. I'm currently 19 weeks along (almost half there!) and we're having a baby girl. Lucy Joanna is due February 9, 2012. This was unplanned (by us, not by God) but we're happy and excited. Of course this means in the near future we'll have to move, but ah well. Just means going through and getting rid of more stuff.

With this whole development, my goal is to become a more domestic housewife. Sure I'm working close to full-time hours now at the bookstore, but after Lucy is born, I would love to only work there the hours my position is suppose to work (15 hours a week) and be a mostly-stay-at-home-mom. Honestly, that's what I really wanna be when I grow up; a full-time housewife/mother. In that endeavor I'm trying to keep the apartment more clean, cook more meals from scratch (or scratch-ish, depending on how I'm feeling) and just being like Mrs. Beaver from the old TV show Leave it to Beaver.

I think this is going to be bumpy road as I'm totally not a neat freak, but maybe having a kid will help that? One can only hope....

So you, my lovely readers, will get to read all about the great adventures we're having here in our household. I'll post any advice that I come across as well as recipes, book/movie/video game reviews, and just other random snippets of stuff that I enjoy. (Trust me, things can and probably will get a little weird at times.)

Well, I think that's long enough for a first post in a new blog. Hope you guys will enjoy this and please, feel free to comment. I love reading comments. :)