First of all, you need to decide what size of blanket you want. The first blanket I ever made, I got 3 yards. That was a very large blanket and was actually big enough for 2 people, which was good since it was a Christmas present to my brother- and sister-in-law. Generally, for children and infants, 1 to 1 1/2 yards is good. For a throw blanket, 2 yards should be good.
When you've decided what size you want, then go out and get your fabric. I like to do one side with a pattern or a panel and the other side a plain color. This is all up to personal preference, however. Do whatever makes you, or the person receiving the blanket, happy.
Next, fine a table big enough to hold the fabric. If your in the position as I am and don't have access to a table that large, then using the floor is totally fine. Line up the fabrics corner to corner. If there is some overage of one of the other, don't worry. We'll take care of that in just a moment.
 |
| Fabric all line up! |
Next, cut off a 4 in x 4 in square off from all four corners. This will prevent your corners from looking funky.
Now, using your handy-dandy tape measure or ruler and cut strips 4 inches deep into the fabric one inch apart. Should look something like this:
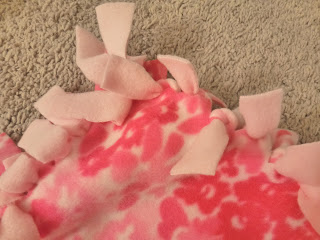
After doing that on all four sides, start tying those strips together. Just a simple knot will do, but make sure to do it twice so they don't come undone while your snuggling with it or putting it through the wash.
 |
| All tied together |
 |
| 1 1/2 yards of snuggly goodness |
And here's a smaller blanket which I made for my own daughter. I think it started a little bit smaller than 1 yard and it's not nearly as wide as the other one, but I love the colors in this, especially the tie-dye green that I used on the backside.
 |
| If you can't tell, it's Snoopy. :) |


No comments:
Post a Comment